

Recovery Home Management Software Solutions: The Complete Guide
June 30, 2026
Standard Assessment Procedure Software: Complete Guide to Features, Benefits, and Uses
June 30, 2026
Flashing software on an LCD controller board may sound like a job only for professional technicians, but with the right tools, patience, and knowledge, even a beginner can complete this task safely. Many people search for how to flash software on LCD controller boards when their television, monitor, or display panel starts showing errors, loses certain settings, or stops working after a firmware corruption. This guide walks you through everything you need to know in simple, easy-to-understand language, from identifying your board to successfully writing new firmware onto it.
What Is an LCD Controller Board
An LCD controller board is the small circuit board responsible for managing how a display panel receives, processes, and shows video signals. It controls brightness, resolution scaling, color processing, and communication between the input source and the actual screen. Inside this board, there is usually a small memory chip that stores the firmware, which is essentially the operating instructions the controller follows every time it powers on.
When this firmware becomes corrupted due to a power surge, failed update, or manufacturing defect, the display may show a blank screen, flickering lines, or refuse to turn on altogether. This is exactly when learning how to flash software on LCD controller boards becomes useful, because reflashing the firmware can often restore the board to working condition without needing a full replacement.
Why Firmware Flashing Is Needed
There are several practical reasons someone might need to flash firmware onto their controller board. Sometimes the board stops responding properly because of corrupted data, and a fresh firmware write resolves the issue completely. In other cases, people flash a different firmware version to gain compatibility with a different panel size or resolution, especially when reusing controller boards from old televisions for DIY monitor projects.
Another common reason is changing the on-screen display language or menu settings that are otherwise locked in the original firmware. Technicians also flash firmware to fix bugs that the original manufacturer never patched, since many of these boards no longer receive official support. Understanding these reasons helps you decide whether flashing is actually the right solution for your specific problem before you begin the process.
Who This Guide Is For
This guide is written for both complete beginners who have never opened a programmer tool before and for intermediate hobbyists who want a clear refresher on the correct flashing process. If you are comfortable using a screwdriver, identifying components on a circuit board, and following instructions carefully, you will be able to follow along without difficulty.
That said, this is not intended for people who are uncomfortable working with electronics or who are not prepared to accept the small risk of damaging their board. Flashing firmware incorrectly can sometimes render a board completely unusable, so going in with realistic expectations is important.
Safety Disclaimer and Risk Warning
Before going any further, it is important to understand that flashing firmware always carries some risk. Writing the wrong firmware file, losing power during the process, or connecting the programmer incorrectly can damage the flash chip or the entire board. Always work on a board that is fully disconnected from main power, and never attempt this process on a board that is still plugged into a wall outlet.
If you are not confident in your ability to follow these steps precisely, it is wiser to consult a professional repair technician rather than risk permanently damaging an otherwise repairable board.
Understanding LCD Controller Boards
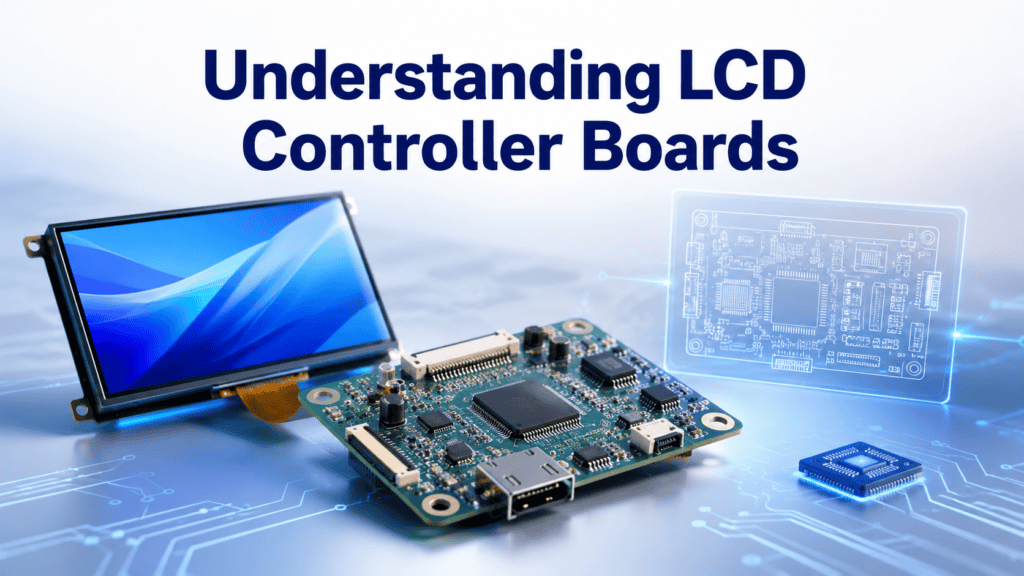
Before learning how to flash software on LCD controller boards, it helps to understand the different types of boards you might encounter and how they generally function.
Types of Controller Boards
Controller boards generally fall into two categories. Universal boards are designed to work with a wide range of panel sizes and brands, and they are commonly used by repair shops and hobbyists because of their flexibility. Dedicated boards, on the other hand, are built specifically for one television or monitor model and usually cannot be swapped easily between different devices.
Common Controller Chip Families
Several chip families are commonly found inside these boards, and recognizing them will help you find the correct firmware later. Some of the most frequently seen families include TSUMV, RTD, MSD, CV, and the T.SKR or T.VST series. Each of these chip families has its own firmware structure, so firmware from one family will almost never work correctly on another.
Components on the Board
A typical controller board includes the main processing chip, a small flash memory chip that stores the firmware, various connectors for the panel cable and power supply, and supporting components like capacitors and voltage regulators. The flash memory chip is the specific component you will be working with throughout this guide.
How Firmware Works on These Boards
The firmware stored on the flash chip tells the main controller how to interpret incoming signals, what menu options to display, and how to communicate with the panel itself. When you flash new software, you are essentially replacing these instructions entirely, which is why using the exact correct firmware file matters so much.
Tools and Equipment Needed
Having the right tools ready before you start will make the entire process smoother and reduce the chance of mistakes.
Hardware Tools
You will need a CH341A USB programmer, which is the most widely used and affordable tool for this kind of work. A SOP8 test clip is also necessary if you plan to flash the chip while it remains soldered to the board. For more advanced users, a ZIF socket allows you to remove the chip entirely and flash it outside the board, which tends to give more reliable results. A soldering iron is only needed if you choose to desolder the chip for off-board flashing.
Software Tools
On the software side, programs like AsProgrammer or NeoProgrammer are commonly used to communicate with the CH341A device. You will also need to install the correct USB driver for the programmer before your computer can recognize it properly.
Identifying Your Exact Board Model and Version
Before downloading any firmware, take a clear photo of your board and note down every number printed on it, including the main board number and any smaller revision codes near the flash chip. This information is essential because firmware files are version-specific, and using the wrong one is one of the most common causes of failed flashing attempts.
Identifying the Flash Chip
Finding and correctly identifying the flash chip is one of the most important steps in this entire process.
Common Flash Chip Types
Most LCD controller boards use chips from the 25Q series, such as W25Q or MX25L variants. These chips are small, usually rectangular, and located near the main controller IC on the board.
Reading Chip Markings
The chip will have tiny text printed on its surface indicating its exact model number. Using a magnifying glass or your phone camera zoomed in can help you read these markings clearly, since they are often quite small.
Locating Pin 1 and Pinout Diagram
Every flash chip has a small dot or notch marking pin 1, and getting this orientation wrong when connecting your clip will prevent the programmer from detecting the chip correctly, or worse, it could cause damage.
Voltage Considerations
Some chips operate at 1.8 volts while others operate at 3.3 volts. Connecting a 3.3-volt programmer to a 1.8-volt chip without proper adjustment can permanently damage the component, so always confirm the voltage rating before proceeding.
Preparing for Flashing
Proper preparation before you actually begin writing firmware will save you significant trouble later on.
Downloading Correct Firmware
Search specifically for firmware matching your exact board number and revision. Generic or mismatched firmware is the leading cause of bricked boards, so take extra time during this step rather than rushing through it.
Verifying Firmware File Integrity
Whenever possible, compare the file size of your downloaded firmware against other reports of the same file online, since a corrupted or incomplete download can cause the flashing process to fail partway through.
Backing Up Original Firmware
This step cannot be skipped. Always read and save a copy of your existing firmware before writing anything new, because this backup file is your only way to restore the board if something goes wrong during the new firmware write.
Setting Up the Programmer Software
Open your chosen flashing software, connect the programmer to your computer via USB, and confirm that the device is recognized before attempting to connect it to the flash chip itself.
Step-by-Step Flashing Process
This is the core process for how to flash software on LCD controller boards, broken down into manageable steps.
| Step | Action | Purpose |
| 1 | Connect programmer to flash chip | Establish communication link |
| 2 | Detect chip in software | Confirm correct chip model |
| 3 | Read and save original firmware | Create a recovery backup |
| 4 | Erase the chip | Clear old data before writing |
| 5 | Write new firmware | Install updated software |
| 6 | Verify the write | Confirm successful flashing |
Connecting the Programmer
You can either clip the SOP8 test clip directly onto the chip while it stays on the board, or desolder the chip and place it into a ZIF socket for a more stable connection. Beginners often find the clip method easier since it avoids soldering work entirely.
Detecting and Selecting the Correct Chip
Once connected, open your flashing software and use its automatic detection feature to confirm it recognizes the exact chip model. If detection fails, double check your clip orientation before troubleshooting further.
Reading and Saving Original Firmware
Use the read function in your software to pull the current firmware off the chip and save it somewhere safe on your computer with a clear file name that includes the board model and date.
Erasing the Chip
Before writing new data, the software will typically need to erase the existing contents of the chip completely, which only takes a few seconds in most programs.
Writing New Firmware
Load your downloaded firmware file into the software and begin the write process. Avoid disconnecting the USB cable or losing power during this stage, since an interrupted write is one of the main causes of permanent chip damage.
Verifying the Write
Most programmer software includes a verification step that compares the written data against the original file to confirm everything was transferred correctly.
Post-Flashing Steps
After successfully writing the new firmware, carefully reconnect the board to its power supply and display panel, then power it on to check whether everything functions as expected. Navigate through the on-screen menu to confirm settings are displaying correctly, and if the screen remains blank, double check all cable connections before assuming the flash itself failed.
Common Problems and Solutions
Even when following every step carefully, issues can still arise during or after the flashing process.
| Problem | Likely Cause | Solution |
| Board not detected | Driver not installed or bad connection | Reinstall driver, recheck clip placement |
| Bricked board | Wrong firmware file used | Reflash with correct backup or correct firmware |
| No display after flashing | Loose panel cable or incomplete write | Reseat cables, repeat flashing process |
| Chip damage | Voltage mismatch | Replace chip, verify voltage before next attempt |
If you ever end up with a board that no longer responds at all, your saved backup firmware from earlier in the process becomes extremely valuable, since reflashing the original data can often bring the board back to its previous working state.
Safety Precautions
Static electricity can damage sensitive components, so touching a grounded metal object before handling the board is a simple habit that reduces risk significantly. Always ensure the board is fully powered off and disconnected from any outlet before attaching your programmer clip, and never attempt to flash firmware while the board is still receiving power from another source. If at any point you feel unsure about a step, it is far better to pause and research further than to proceed and risk permanent damage.
Frequently Asked Questions
Can flashing be done without a programmer device?
In most cases, no, since the chip needs a dedicated tool capable of reading and writing data directly to its memory.
Is in-circuit flashing safe?
Yes, as long as the clip is positioned correctly and the board remains powered off throughout the process.
Where can correct firmware files typically be found?
Repair forums and electronics communities dedicated to your specific board brand are usually the most reliable sources.
What if your exact board model cannot be found anywhere online?
In that situation, reaching out to repair communities directly and sharing clear photos of your board often leads to someone who has worked with a similar model before.
Conclusion
Learning how to flash software on LCD controller boards is a valuable skill for anyone interested in display repair or DIY electronics projects. By carefully identifying your board, gathering the correct tools, backing up your original firmware, and following each step methodically, you significantly reduce the risk of damaging your equipment while giving yourself the best chance of a successful repair.
Always prioritize safety, take your time during each stage, and remember that having a backup of your original firmware is the single most important precaution you can take throughout this entire process.
Related Articles
Recovery Home Management Software Solutions: Complete Guide (2026)
Verified Software Formal Methods Postdoc Position: The Complete 2025 Guide
Co-Development Software: The Complete 2025 Guide to Building Smarter Together
How Can Scribus Software Be Protected? A Complete Guide for 2025
Perplexity Search Rank Tracking Software: The Complete Guide for 2026


